Magic Editor is a powerful tool on the Pixel 8 that allows you to easily remove unwanted objects from your photos, adjust the colors and lighting, and even add a variety of presets to enhance your images.
Here’s a step-by-step guide on how to use Magic Editor on Pixel 8.
What is Magic Editor?
Magic Editor is a built-in tool in the Google Photos app on the Pixel 8. It uses Artificial Intelligence to identify objects & people in the photos and render a variety of editing options.
You can use Magic Editor to:
- Remove unwanted objects in the image: This is the most popular use for Magic Eraser. Just tap on the object you want to remove, and Magic Editor will do the rest. It’s like having a magic wand for your photos!
- Change the background: Want to put your friend in a tropical paradise? You may want to remove that boring wall from your family photo. Magic Editor can do that too.
- Adjust color and Light: Magic Editor can brighten your photos, fix red eye, and even add a touch of HDR.
- Blur and Sharpen: Want to make your photos look a little crisper? Or maybe you want to blur out a background that’s too distracting? Magic Editor can do that, too.
- Change the look of the sky: Magic Editor can replace the sky and even add clouds!
- Brighten faces: Magic Editor can use AI to adjust the lighting on people’s faces, making them look brighter & even-toned.
- Also, read about the Audio Magic eraser in Pixel 8.
The Process To Use Magic Editor On Pixel 8
Follow the methods below to learn how to use Magic Editor on Pixel 8.
Before using the Magic Editor, back up all your photos.
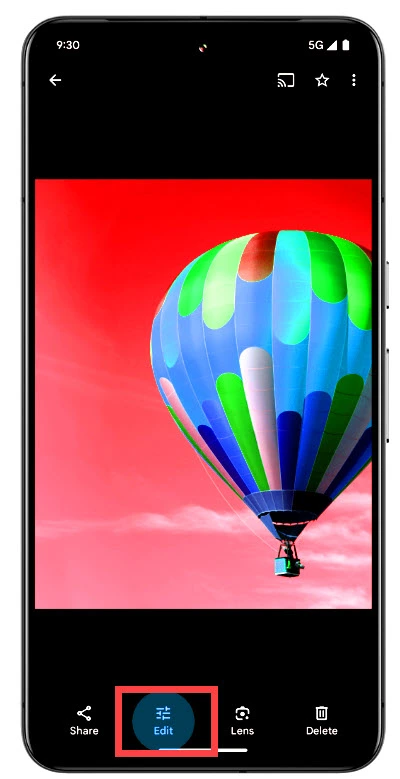
- Open the Google Photos app & select the photo you want to edit.
- Tap the “Edit” icon from the bottom of the screen.
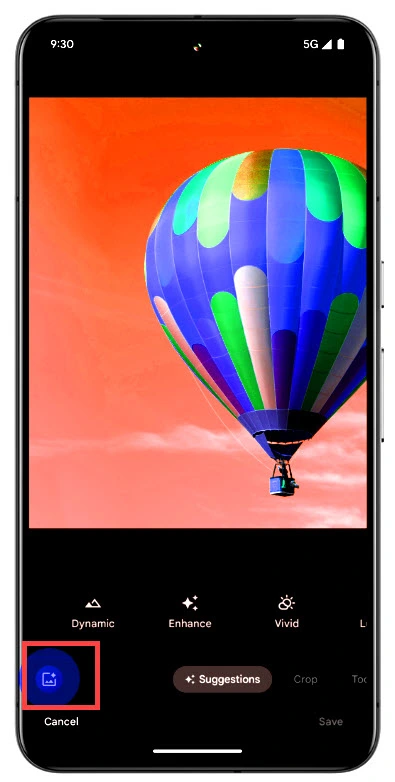
- In the Edit screen, scroll down to the “Tools” section and tap the “Magic Editor” icon. It looks like a photograph with some colorful overlay.
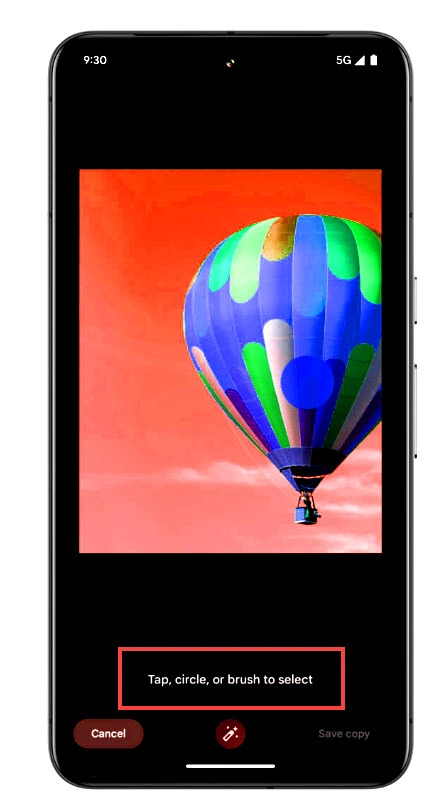
- Next, select the portion you want to edit. You will see a new screen once you tap on the Magic Editor button.
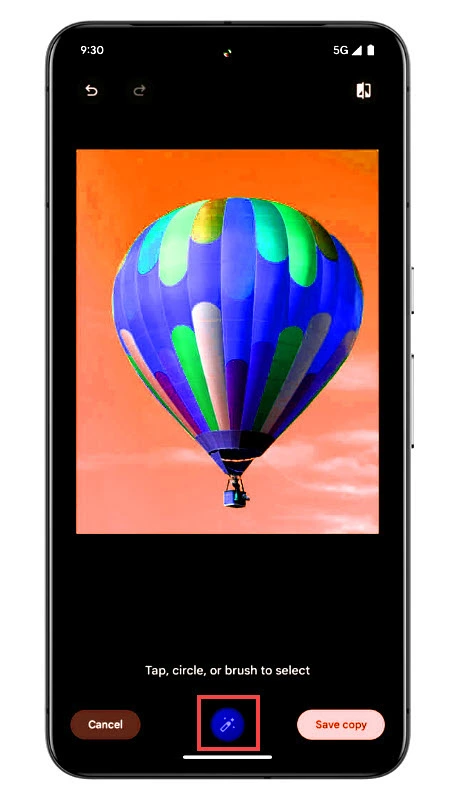
- To move the object in the image, tap on the brush or circle the object to select it.
- Once the object is selected, you can remove it or move it to another location in the photo.
- To remove it, tap the “Remove” button. To move it, tap and hold the selected area and drag it to the desired location.
- Once you have moved it to some desired location, tap the Continue button.

- To adjust the colors and lighting of your photo, tap the “Adjust” button. You can then use the sliders to adjust the image’s brightness, contrast, saturation, and sharpness.
- To add a preset to your photo, tap the “Presets” button. You can then choose from a variety of presets, such as “Portrait,” “Landscape,” and “HDR.“
- Depending on the content of the photo, your pixel will generate the Preset options.
- You can swipe across the screen to see different results for moving the photo’s object. You can swipe across the screen to scroll through various generated options.
- Next, select Done.
- If you’re not happy with the results of a particular edit, you can always undo it by tapping the “Undo” button.
- You can also use multiple Magic Editor tools on the same photo. For example, you could remove an object, adjust the colors, and add a preset.
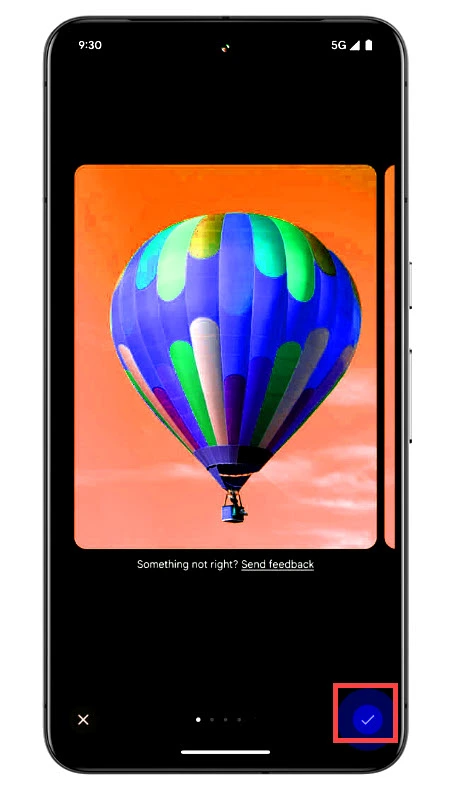
- Once you’re happy with your edits, tap on the arrow at the bottom right side to generate the image. Next, tap on the “tick” icon to confirm.
- Next, select “Save a copy“.
![]()
- Once the image is generated, you can see a preview of the image. Tap on the tick to save the picture in your gallery.
Wrapping Up
So, there you have it! That was how to use the Magic Editor in Pixel 8. For more details, write to us in the comments section below.